excel合并多工作簿指定单元格区域
文章来源:会计EXCEL模板
作者:外链代发
人气:13
 2022-06-11 17:49:33
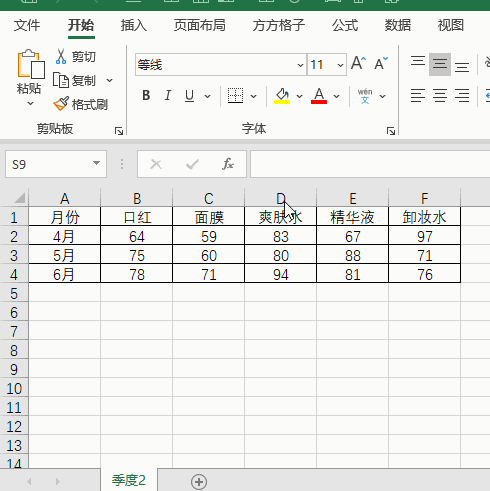
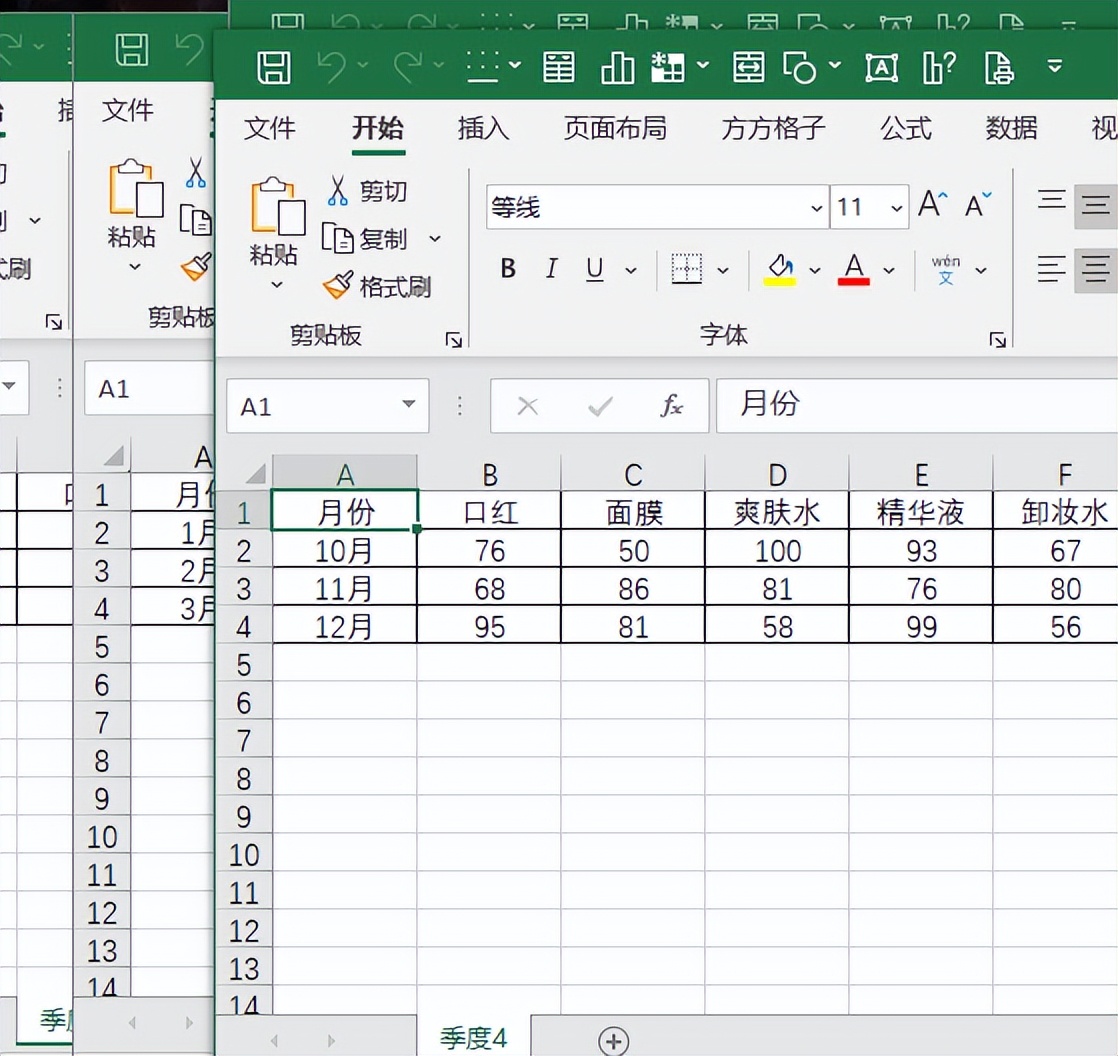
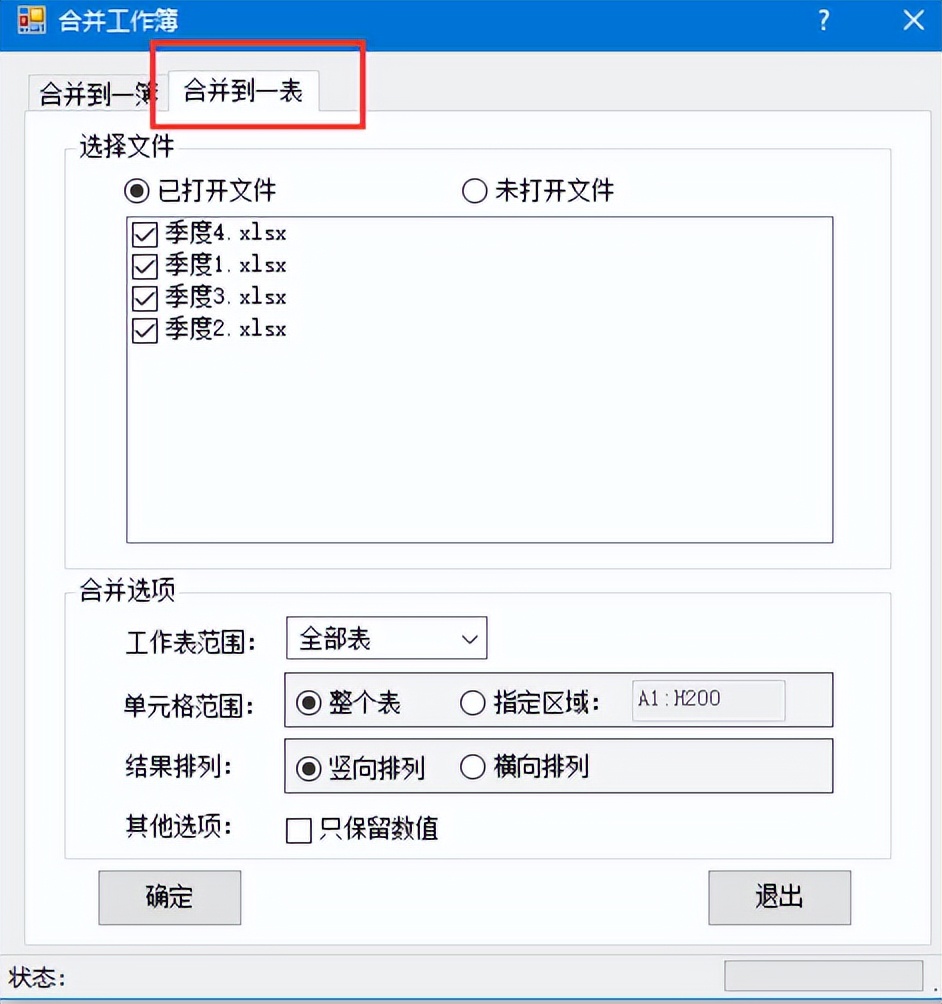
1.如下图打开了四个工作簿,现在我们想要快速合并这四个工作簿指定单元格区域A2:F4.
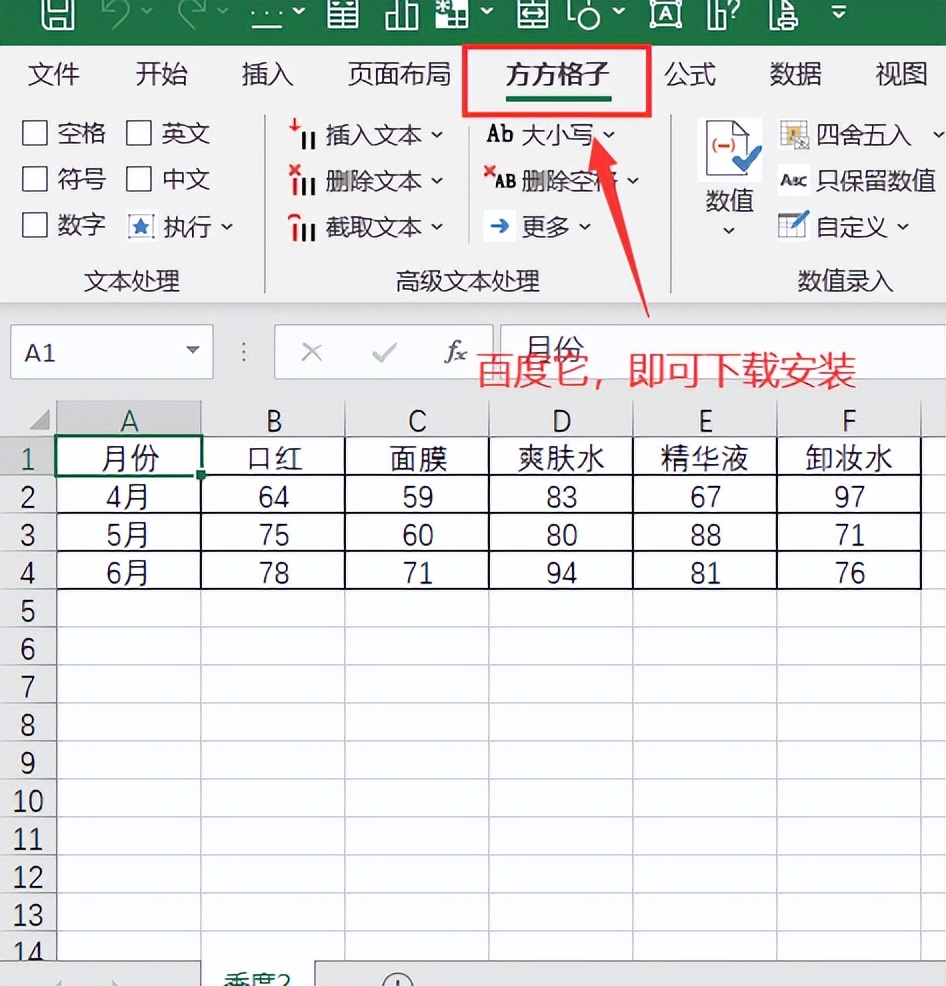
2.点击下图选项(Excel插件,百度即可了解详细的下载安装方法,本文这里不作详细叙述)
3.点击【汇总拆分】
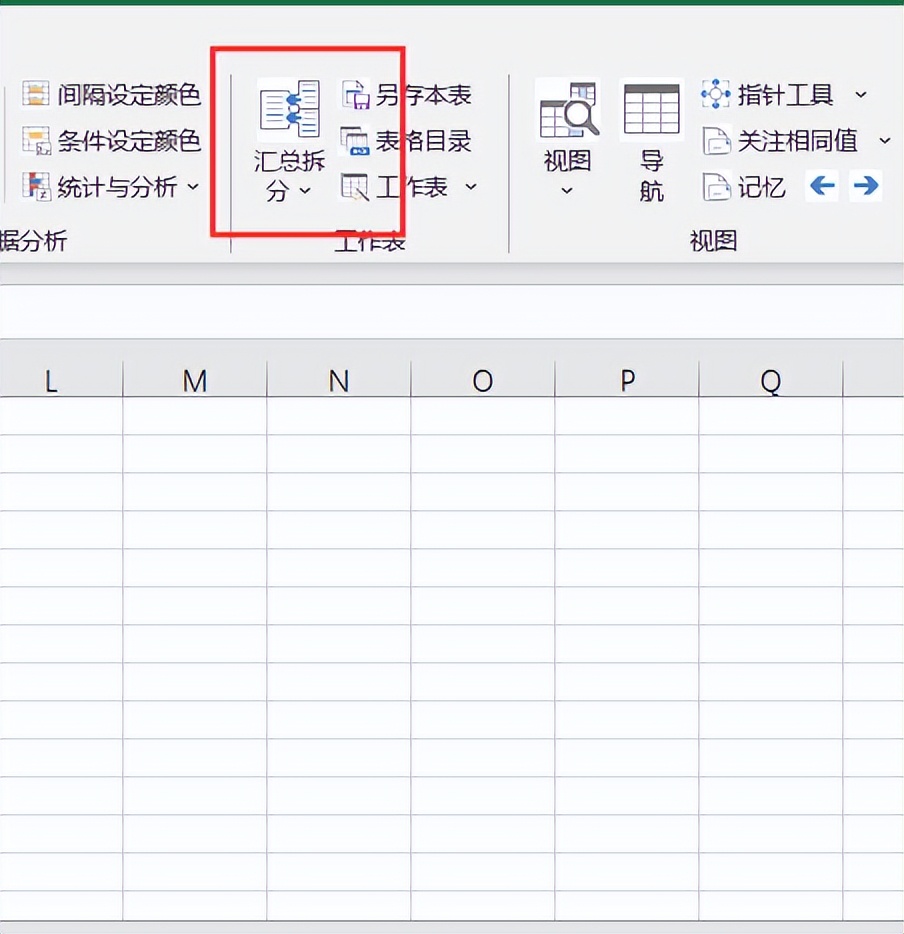
4.点击【合并多簿】
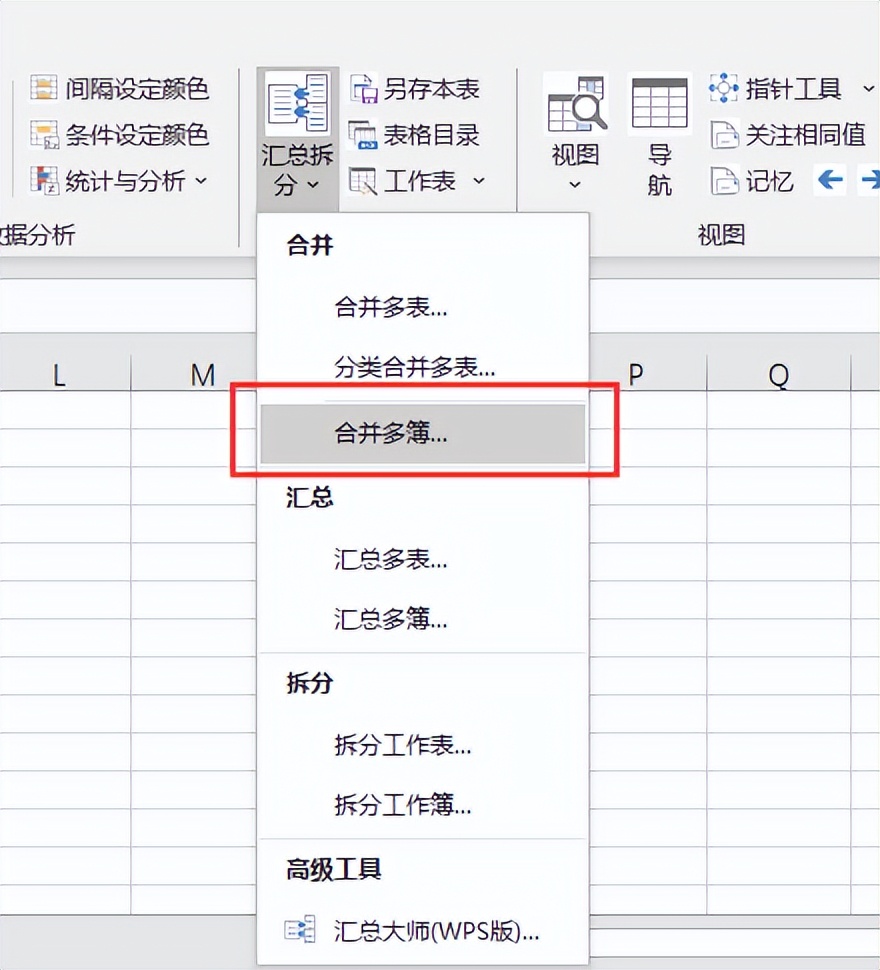
5.点击【合并到一表】
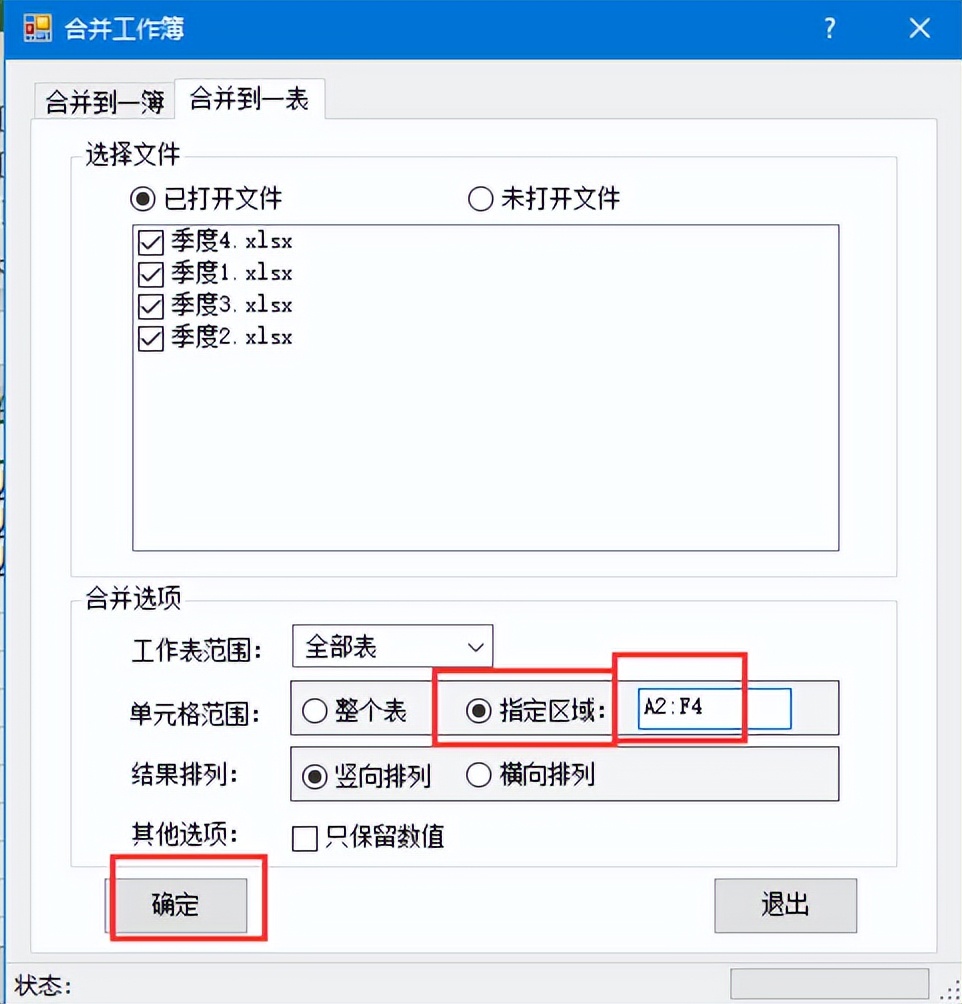
7.勾选【指定区域】,并在后面录入A2:F4。,最后点击【确定】即可完成
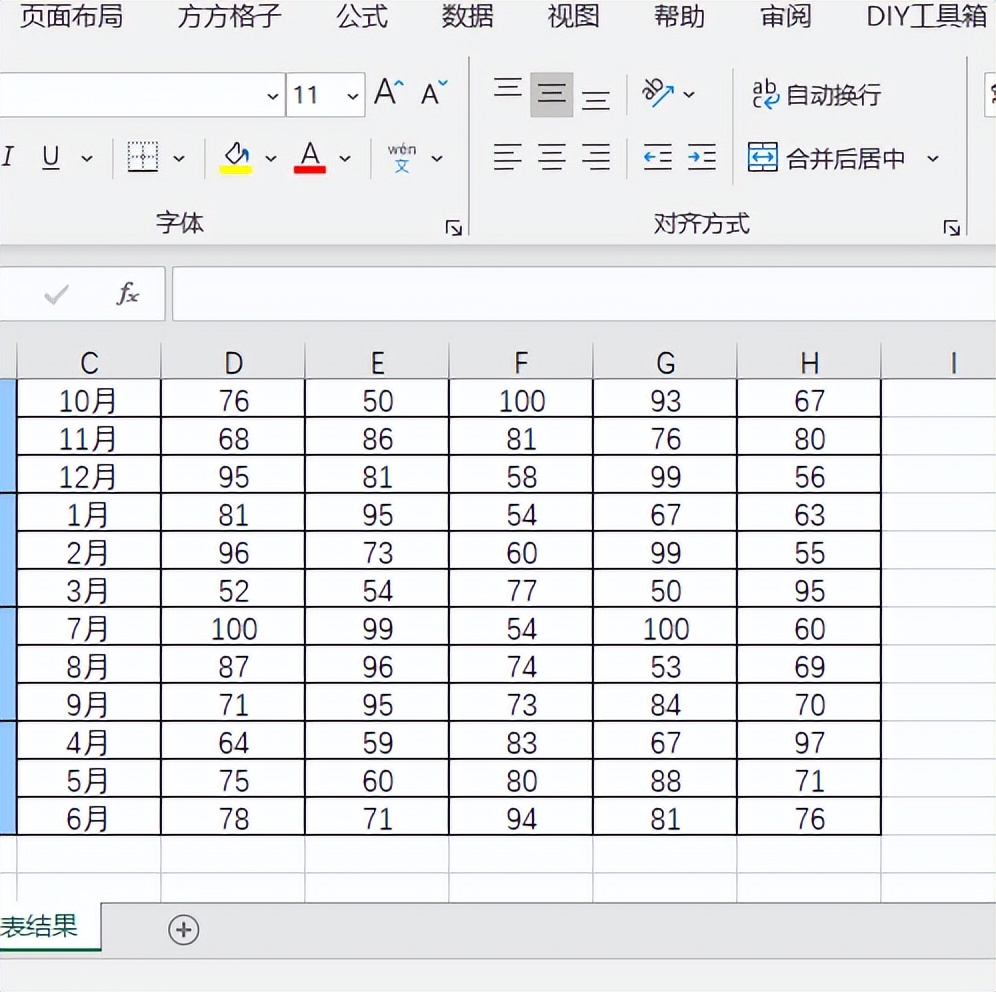
8.完成效果如下图所示
上一篇:excel合并表格内容之多工作簿汇总一簿
下一篇:没有了